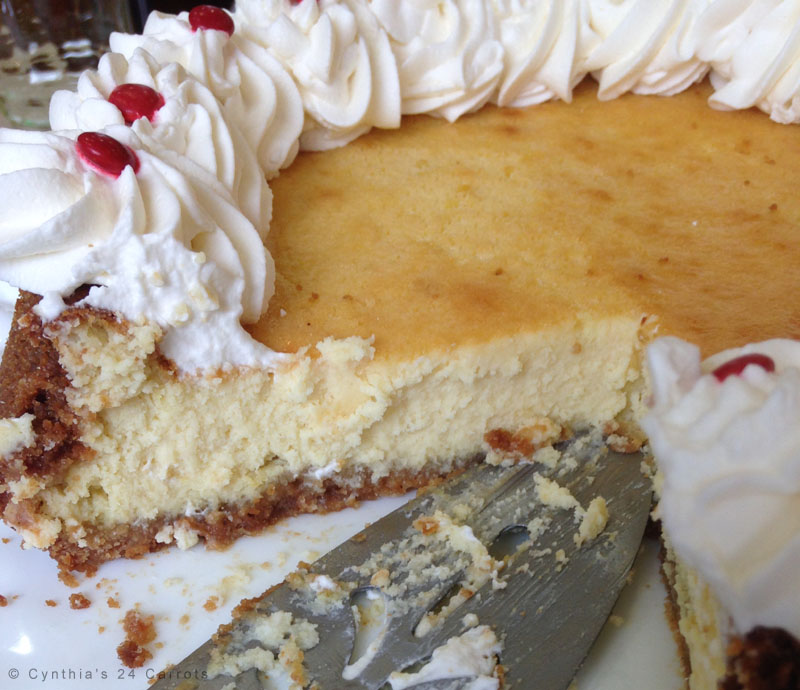
Cheesecake is rich, creamy, and delicious and is by far one of the ultimate comfort foods. It is simple to prepare but it does take a long while to bake, cool and set before it’s ready to be served. I decorated this Cheesecake Decked for Christmas with fresh, homemade, whipped cream rosettes and added a red hard shelled candy for contrast.

Cheesecake can be presented it in a variety of ways because the structure remains the same while the garnishes change the look and the taste. It can be served right out of the baking pan or it can be dressed up with a multitude of garnishes including glazes, fruit or whipped cream. I chose to use whipped cream with this cheesecake.
This cheesecake was baked with a simple graham cracker crust. I used Maida Heatter’s technique to prepare the springform pan with the crust. This method helps reinforce the bottom of the crust, making it easy to lift off of the pan and place on a serving dish.

Maida Heatter’s Longchamps’ Cheesecake turned out to be creamy and delicious with the taste of lemon coming through. When I bake this cheesecake again, however, I will use less lemon rind than the recipe indicates but that is a purely personal choice.
Our Tea for Modern Times featuring Cheesecake Decked for Christmas was inspired by the colors of the Christmas season. I incorporated a few shiny silver Christmas balls to finish off the look.

The table was set with an ideal, circa1950’s tablecloth in hues of red, green and black and by chance several threads of silver were woven into the fabric. I chose red, hand embroidered napkins to accentuate the reds and frame the afternoon tea service. The cheesecake was served on a Fenton, hobnail, white milk glass cake stand with a ruffled edge. The tea pot was Linea’s Soho pattern which blended well with the creamer and sugar bowl by Mikasa’s Bob Van Allen stone white pattern. Cath Kidston’s red and green polka dot tea cups by Churchill added a dash of fun. To add height and interest to the table setting I used Depression glass wine glasses in a very pale shade of green, optic glass.
This Tea for Modern Times was dazzling as a Christmas décor. English breakfast tea was poured which complemented rather than competed with the taste of the cheesecake. The cheesecake was decorative and delightful as a centerpiece and provided us with comfort and joy befitting the season!
Longchamp’s Cheesecake Filling
Maida Heatter’s Recipe from her book Maida Heatter’s Cakes
16 ounces Philadelphia brand cream cheese, preferably at room temperature
1 cup granulated sugar
¼ teaspoon salt
6 eggs
1 cup heavy cream
1 teaspoon vanilla extract
Finely grated rind of 2 large lemons
Your favorite graham cracker crust recipe
Preheat oven to 350°F.
Maida Heatter’s Crust Technique
Generously butter the sides only of a 9 x 2 ½ or 3 inch springform pan. (Leaving the bottom unbuttered makes it easier to transfer the baked cake to a serving plate.) Prepare your crust and remove and reserve 1 ½ cup of the mixture. Press the remainder onto the sides of the pan – it should be 2 inches deep. Press the reserved mixture evenly onto the bottom. Press firmly all over. Place in the refrigerator or freezer until you are ready to use it.
Cheesecake Filling
In a large bowl of an electric mixer, beat the cream cheese until it is soft and very smooth. Add the sugar and beat very well, scraping the bowl as necessary with a rubber spatula – the mixture will be smooth. Add the salt and then the eggs, one at a time, beating well after each addition. Then beat in the cream and the vanilla. Remove for the mixer and stir in the rind.
Pour the mixture into the prepared crust.
Bake at 350°F for 1 hour and 20 minutes.
Then, do not remove the cake from the oven, but turn the heat off, open the oven door about 6 or 8 inches, and let the cake cool.
With a small, arrow metal spatula or with a table knife, cut around the cake between the crust and the pan, pressing the blade against the pan. Carefully remove the sides of the pan.
Refrigerate for several hours or a day or two.
The cake may be served on the bottom of the pan or it may easily be transferred to a flat cake plate. To transfer, use a strong and firm (not flexible), long, narrow metal spatula, or a strong knife with about a 6 inch blade. Insert the spatula or knife between the crust and the pan and gently ease it around to release the cake. It will be easy if the bottom of the pan has not been buttered and if the cake has been chilled enough. Then use either a flat-sided cookie sheet, the bottom of a loose-bottomed quiche pan, or two metal spatulas to transfer the cake.